- Home
- >
- Preservation Archaeology Blog
- >
- Making Atlatls
(September 30, 2015)—We carved atlatls again at this past summer’s Preservation Archaeology Field School, but this year the students had to use stone tools for the carving work. Previously, we used modern hand tools like wood rasps and files.
I had experimented a lot with carving wood in the interim, and I devised some techniques for using stone tools that worked quite well, making it feasible to carve an atlatl in less than a day. The major breakthrough came when I realized that the wood should be carved when wet. If the oak dries out, it becomes incredibly tough to carve, but by keeping the wood wet and periodically dipping it in water as you carve it, the process is very easy.
This year, I took the students to the San Francisco River to do the carving. The trailhead was about 20 minutes from camp, and it took about an hour to hike down to the river. We could sit on the banks of the river and carve in the shade. Some days, we watched Desert bighorns in the cliffs above us as we carved. (Put your cursor over the images in the gallery below to read the captions.)
[tn3gallery id=41 size=narrow]
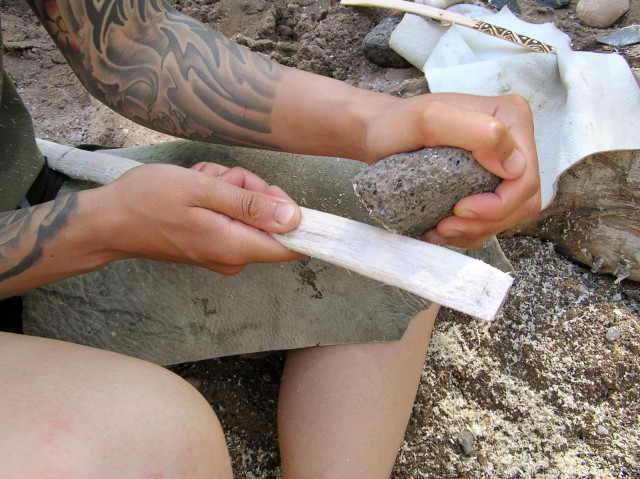
Due to the larger diameter of some of the oak logs I selected, I chopped them down to a more manageable size for the students to carve. In the distant past, carvers seem to have chosen small sapling trees not much wider than the atlatl they were carving. The students began by using flakes and cores as planers to shave away the wood. With a little practice, this technique worked quite well. As the carving proceeded, the small knots we encountered in the wood proved to be quite a challenge to work around. We started using broken, jagged pieces of vesicular basalt as rasps; we found that these worked quite well. Our basalt rasps looked more like fire-cracked rock fragments than tools.

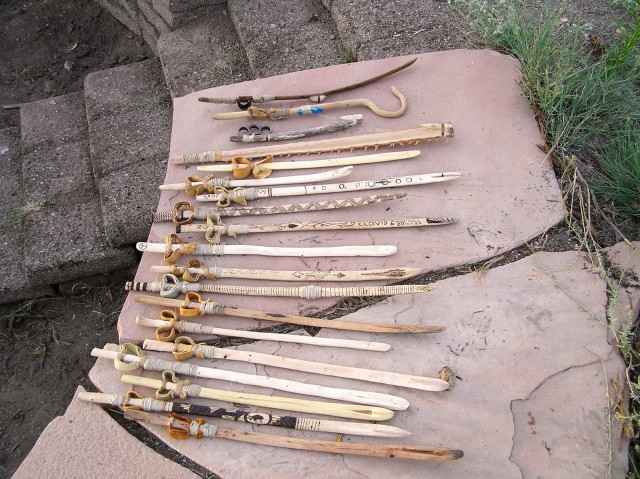
Once we thinned the blanks down to the desired thickness, we carved the handle notches and hook. We found that using a late-stage biface worked well for carving the hook, and the basalt rasps worked well for creating the handle notches. Leaving a small ridge raised up from the atlatl surface made it easier to carve the hook, as well. Many examples of such raised hooks appear on ancient Southwestern atlatls. After we finished the hook and notches, we left the atlatls to dry out so they could be smoothed. We used small pieces of sandstone and vesicular basalt for this final sanding work.

We attached the leather loops with wax string (in place of sinew) in a manner common to atlatls found on the Colorado Plateau. To finish the atlatls off, students used a wood-burning iron to create designs. I know of at least one atlatl from the Safford area that had designs burned on it.
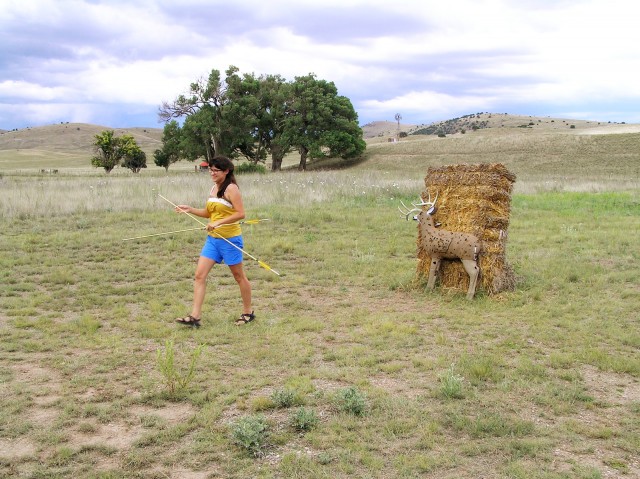
We had an accuracy contest on July 4. The students shot at our 3-D deer target with three darts from two distances. The winners were Victoria (1st place), Conner (2nd), and Alisha (3rd). By the end of the field school, the deer was pretty well riddled with holes—some of the students got to be incredibly accurate.
If you live in the Tucson area, and you’d like to try your hand at ancient technologies with Allen, click here to check out his upcoming Hands-On Archaeology classes.

2 thoughts on “Making Atlatls”
Comments are closed.
Explore the News
Related to This
-
Project Hands-On Archaeology

Have you published details on atlatl design and construction. I would appreciate the opportunity to build my own, but am unable to travel to your area.
If not, I understand and shall vicariously explore via Preservation Archeology!
Blessings,
Ron
I have not published any directions, but there is a article in Bulletin Of Primitive Technology Spring 2010 : No. 39.
the author is Chuck LaRue, and the title is Looking Closer at Basketmaker Atlatls and Darts. Chuck shows lots of great illustrations on the construction of Basketmaker atlatls.
I hope to have a fact sheet out in the near future that also shows ways of making atlatls. I havean Atlatl manufacturing class on October 17th here at Archaeology Southwest’s office.
Good Luck!
Allen