- Home
- >
- Preservation Archaeology Blog
- >
- What’s the Point: Folsom Technology, 12,800 to 1...

This is the third post in a new series called “What’s the Point?” Allen Denoyer and other stone tool experts will be exploring various aspects of technologies and traditions.
(September 9, 2021)—Folsom points are one of the most iconic point styles from the Early Paleoindian. Folsom points are named for a site near Folsom, New Mexico, where they were first documented in association with Bison antiquus bones. These points are widely dispersed across the central and western United States.
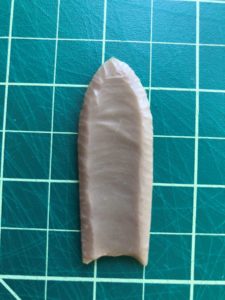
In this post, I want to discuss how people made these points and how we identify them. There has been a ton of research on Folsom point technology, and many modern flintknappers aspire to replicate the technique. Folsom technology appears to derive directly from Clovis technology, and both technologies rely on fluting to thin the points. (I’ll discuss fluting shortly.)
Many Folsom campsites have been excavated, and by analyzing the broken points and manufacturing waste (flakes) left behind, archaeologists and experimental archaeologists have been able to re-create the manufacturing process. By replicating all stages of manufacture, we’ve been able to gain a much better understanding of the process.
What Makes a Folsom Point a Folsom Point?
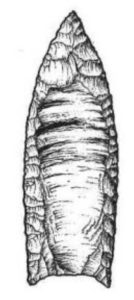
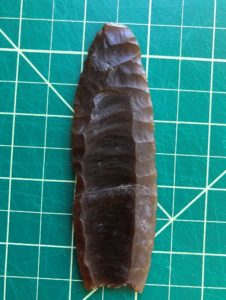
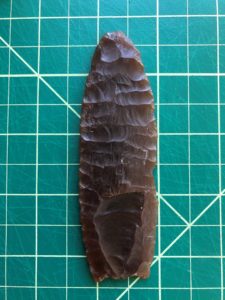
The short answer is the distinctive basal thinning flakes called flutes. These are just flakes removed from the base to allow the point to easily slot into a foreshaft. Finished Folsom points are distinguished by flutes that extend nearly the full length of the point, and they are also much thinner in cross-section than Clovis points.
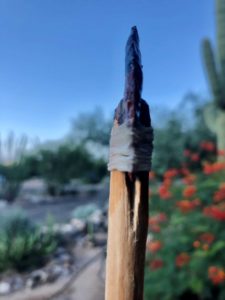
(People have proposed that the flutes were bloodletting grooves, but this does not account for the simple fact that the point had to be hafted to something in order to be propelled into a bison.)
How to Make a Folsom Point
Here are the stages in the manufacturing process that we’ve come to recognize from the archaeological record:
1. Initial biface. Start from a large flake or a tabular piece of rock.
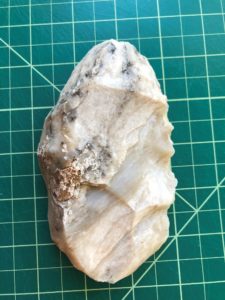
2. Biface thinning. Use hammerstones and antler billets to flatten and thin both faces prior to pressure flaking.
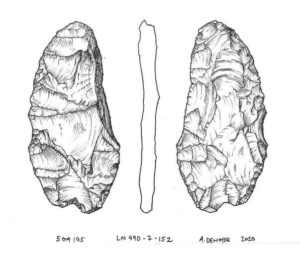
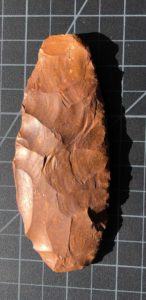
3. Pressure flaking. Use the distal ends of deer or elk antlers to pressure-flake the first face and set up the platform for the first flute flake.
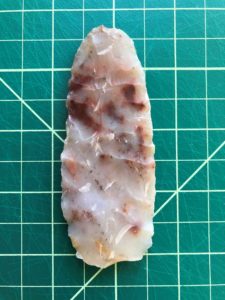
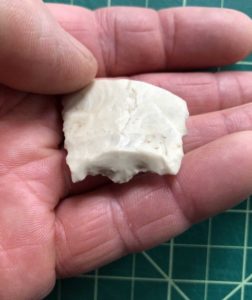
The pressure flakes are bigger and spaced a bit further apart than the flakes on the second face. The goal is to create a nice, slightly domed face the flute flake can travel down without encountering any flaws or irregularities to cause the flake to stop or dive through and break the point.
Makers concentrated on one face at a time (and so do I and so should you).
If enough of these flake scars are still preserved on the finished point, we can tell which face was fluted first.
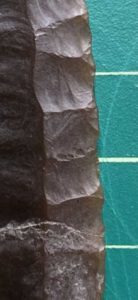
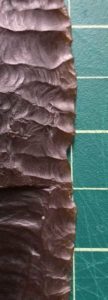
4. First flute removal. Master flintknapper Bob Patten used to do his fluting with freehand percussion, and this method seems to do a great job replicating the flute scars we see on ancient examples like the one below, a biface from the Barger Gulch Folsom site near Kremmling, Colorado.
5. Second flute removal. After striking the first flute successfully, prepare the other face. Press a series of slightly smaller flakes across this face, doming it so the flute flake can follow it. These flakes should extend to the midpoint of the biface or just slightly past it. Set up a platform in the same manner as the first face, and strike. This second flute tends to be smaller than the first one, largely due to the fact the biface is smaller after the preparation of the second face.
I have to admit, this step is HARD. I have broken so many bifaces trying to flute them! This is why I’m in awe of Folsom knappers.
6. Retouch the margins (edges). Quite often Folsom knappers did an extremely fine retouch along the lateral margins of the base, which often obliterated the earlier flake scars.
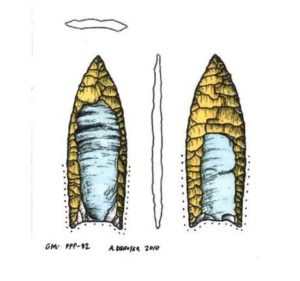
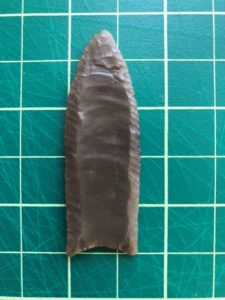
7. Grind the edge of the base. Just like with Clovis points, makers heavily ground the basal margins to finish a Folsom point. This grinding dulled the edges, strengthening them and eliminating the chances of the hafting material getting cut and causing the point to come loose on impact.
Now Haft the Point into a Foreshaft
There are no extant Folsom foreshafts, so we have to guess what they may have looked like. I adhered this point to its haft with pine pitch, and then I wrapped that with deer sinew. I made the foreshaft out of oak.
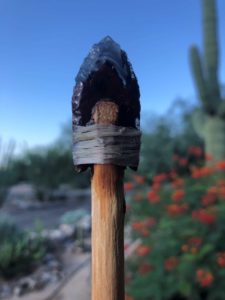
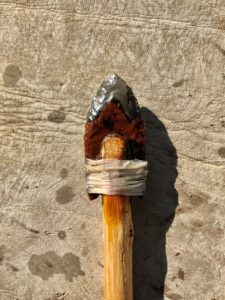
What Happened When a Point Broke?
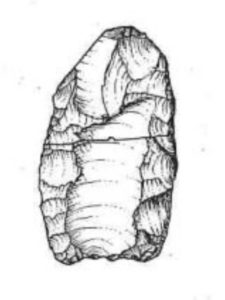
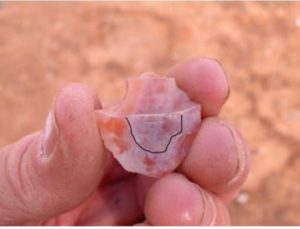
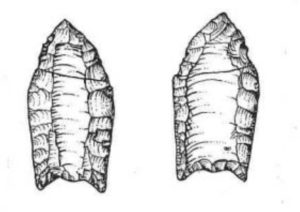
This is a Folsom point from Barger Gulch that really nicely shows how people reworked these points after they were broken. The bulk of found Folsom points were broken and reworked at least once. The way they were hafted would allow the point to be slid forward in the haft and reshaped. In this example, the hafting element ended at the beginning of the reworked edge (everything above the line from one edge to the other).
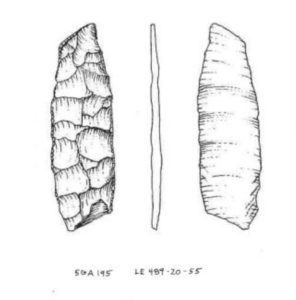
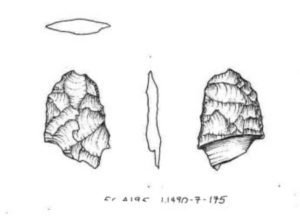
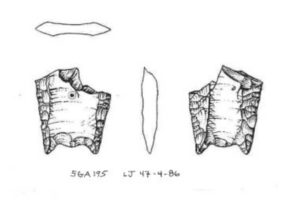
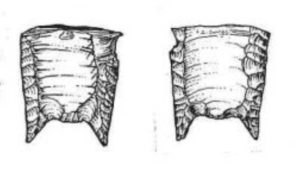
Proximal ends (the bases) are most commonly found at campsites. These examples are from Barger Gulch.
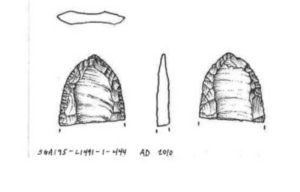
Distal ends (the tips) were lost or discarded when the break occurred, so they are much less common at camps. Broken projectile points were changed out of foreshafts back in camp, and new points hafted into foreshafts. I suspect hunters reused foreshafts many times.
Happy knapping! Let me know how you do…
I would like to thank Todd Surovell for giving me permission to use illustrations I made of artifacts from the Barger Folsom Site in Colorado.
2 thoughts on “What’s the Point: Folsom Technology, 12,800 to 10,200 BP”
Comments are closed.

Thank you, Allen, for your clear and detailed description of these points. The lengths of the flutes are amazing.
I watched J. B. Sollberger make a Folsom from scratch for me in 1978. He explained the process in great detail, including creation of the preform, which he made with great patience and perfection. He used an ancient tool kit. One of the things he told me was the preform had to have a concave shape with no low spots or the flute would terminate. He had a clamp as in his opinion if the preform bent at all failure would occur. On mine the second flute terminated at mid point and he turned the distal end around, created a nipple and fluted the point from the other direction. The flute completed as planned but the pressure rings were from different directions. I ask him about hafting the point and he felt on the cutting edges were exposed as the Folsoms are 3-4 mm thick with minimal exception.I agree as the point needed to be hafted so only the cutting edges were exposed to minimize fracture on impact.
In his opinion if they were thicker between flutes it was a failed effort. To take the fluts out he applied some lever pressure at a 6 deg angle. He held the lever for a fwr seconds before the flutes released. His retouch was done with a wedge shaped bone bone and went along the ridges left by the pressure flaking. There may be other people that can make a Folsom but unless they use an ancient tool kit it is not a true reproduction. I live in central TX and quality chert is abundant. I have made a few Clovis points but a Folsom is far out of my potential. Why the Folsom Indian went to so much trouble to make such a delicate point is a mystery to me as the Plainview was just as effective at killing a bison. great post. I very much enjoyed it.